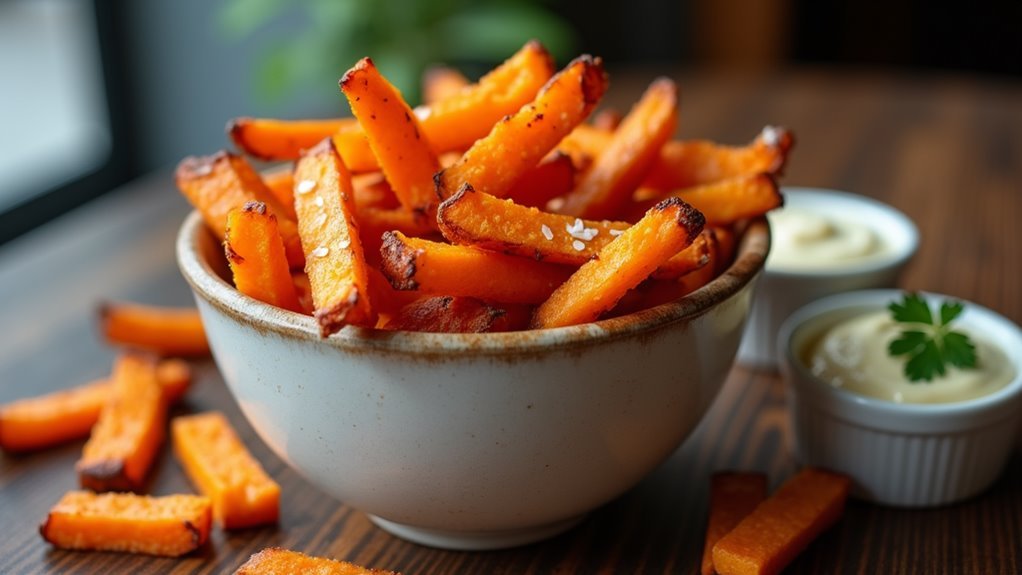
After serving these golden-brown sweet potato fries at a neighborhood potluck, you’ll never look at regular french fries the same way again. You’re about to discover how a simple soaking technique and the right seasoning blend can transform ordinary sweet potatoes into crispy, caramelized strips of pure joy. When paired with a creamy, garlicky aioli that packs just the right punch, these baked fries elevate any meal from basic to spectacular. Let’s uncover the secrets to achieving that perfect crunch without the deep fryer.
Key Takeaways
- Soak sweet potato strips in cold water for 30 minutes before baking to remove excess starch and achieve maximum crispiness.
- Cut sweet potatoes into uniform 1/4-inch thick strips, coat with olive oil and sea salt, then bake at 425°F.
- Bake for 20 minutes, flip the fries, then continue baking 10-15 minutes until golden brown and crispy.
- Mix 1/2 cup mayonnaise with 2 minced garlic cloves to create a simple, flavorful dipping sauce.
- Avoid overcrowding the baking sheet and serve immediately while fries are hot for optimal texture and taste.
History
While sweet potato fries have gained massive popularity in recent years, they’ve actually been around for centuries in various forms. Native Americans were the first to cultivate sweet potatoes, using them in countless dishes long before European contact. You’ll find their earliest documented cultivation dating back to 750 BCE in Peru!
The modern sweet potato fry emerged in the 1960s as restaurants began experimenting with healthier alternatives to traditional french fries. By the 1990s, they’d become a trendy side dish in American gastropubs.
The addition of garlic aioli as a dipping sauce gained momentum in the early 2000s, inspired by European cuisine’s love of aioli with fried foods.
Today, you’ll find these delicious fries everywhere from casual diners to high-end restaurants – they’re here to stay!
Recipe
Sweet potato fries offer a delightful twist on traditional french fries, combining natural sweetness with a satisfying crunch. These oven-baked fries aren’t only healthier than their deep-fried counterparts but also deliver a rich, complex flavor that pairs perfectly with homemade garlic aioli.
Making crispy sweet potato fries at home requires attention to detail, from the thickness of the cuts to proper spacing on the baking sheet. This recipe achieves the ideal balance of crispiness and tenderness while keeping the ingredients simple and the preparation straightforward.
- 2 large sweet potatoes
- 2 tablespoons olive oil
- 1 teaspoon sea salt
- 1/2 cup mayonnaise
- 2 cloves garlic, minced
Preheat oven to 425°F. Begin by washing and cutting sweet potatoes into uniform 1/4-inch thick strips. Soak the cut potatoes in cold water for 30 minutes, then dry thoroughly with paper towels. Toss the dried strips with olive oil and half the salt.
Arrange them in a single layer on a baking sheet, ensuring no overlap. Bake for 20 minutes, then flip each piece and continue baking for 10-15 minutes until golden brown and crispy.
While the fries bake, prepare the aioli by combining mayonnaise with minced garlic and remaining salt. Serve the hot fries immediately with the garlic aioli on the side.
For best results, maintain consistent thickness when cutting the sweet potatoes to ensure even cooking. Avoid overcrowding the baking sheet, as this creates steam and prevents proper crisping.
If necessary, use multiple baking sheets and rotate them during cooking. The fries will continue to crisp slightly as they cool but should be eaten while still warm for optimal texture and taste. Store any leftover aioli in an airtight container in the refrigerator for up to three days.
Cooking Steps
To make perfect sweet potato fries, you’ll want to start by soaking your cut strips in cold water for 30 minutes, which helps remove excess starch and ensures maximum crispiness!
After thoroughly drying the strips and tossing them with olive oil and sea salt, arrange them in a single layer on your baking sheet – remember, no overlapping.
Your fries will need 20 minutes of initial baking at 425°F before you flip them over for their final golden-brown finish, which takes another 10-15 minutes.
Step 1. Soaking Potatoes Before Baking
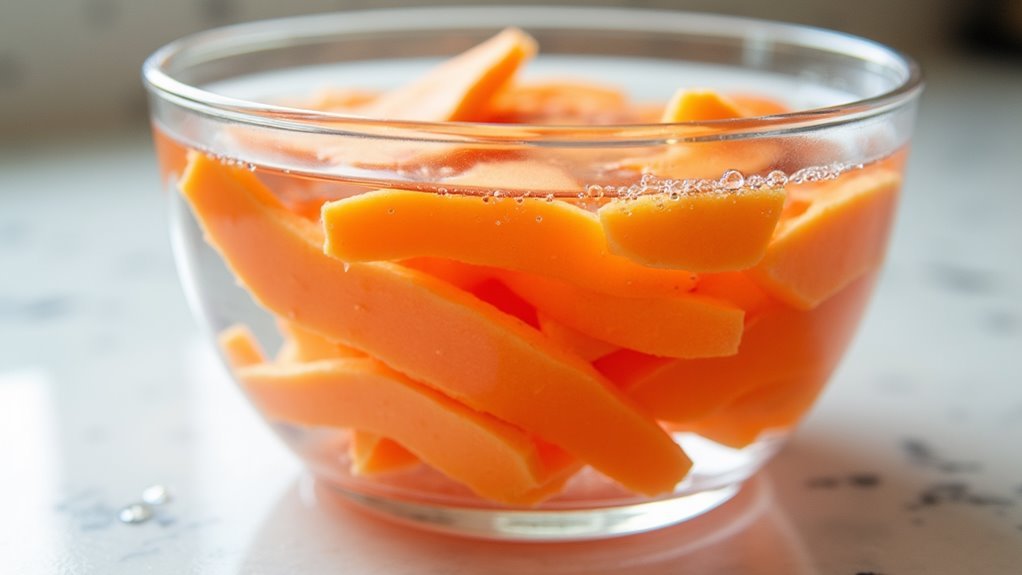
Getting perfectly crispy sweet potato fries starts with a crucial 30-minute soak in cold water! This simple step helps remove excess starch from your cut sweet potatoes, which is the secret to achieving that irresistible crunch you’re looking for.
After cutting your sweet potatoes into uniform 1/4-inch strips, submerge them completely in a large bowl of cold water. Let them soak while you’re preheating your oven and preparing other ingredients.
Once the 30 minutes are up, drain the potatoes and pat them thoroughly dry with paper towels – this step is essential! Any remaining moisture will create steam in the oven, making your fries soggy instead of crispy.
Now you’re ready to season and bake your sweet potato fries to golden-brown perfection!
Step 2. Cut Potatoes Into Strips
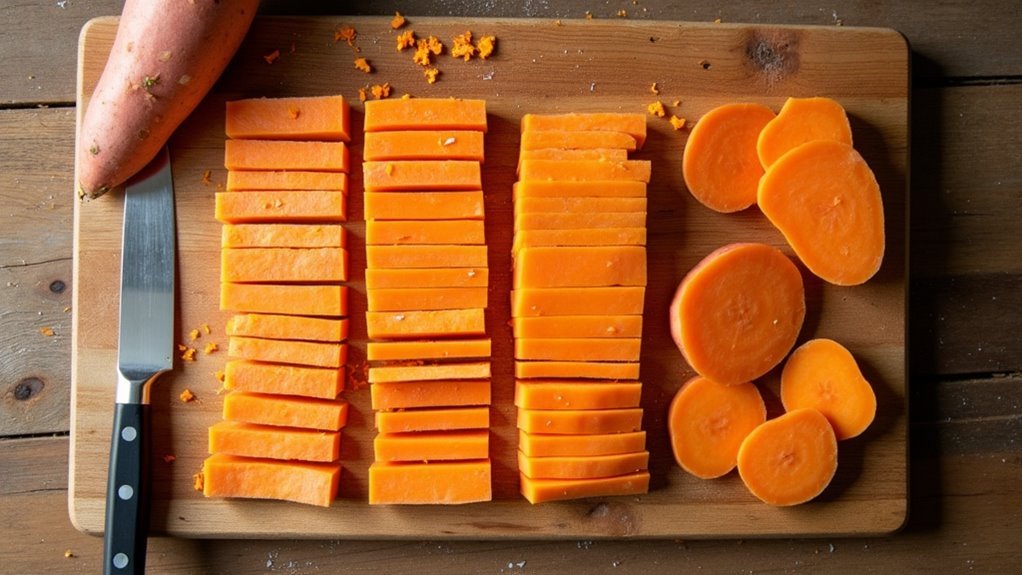
Proper cutting technique makes all the difference in creating bakeable sweet potato strips! Start by washing your sweet potatoes thoroughly and patting them dry.
You’ll want to trim off both ends, then slice the potatoes in half lengthwise to create stable flat surfaces.
Stand each half on its flat side and cut it into 1/4-inch thick planks. Now, stack these planks and slice them lengthwise into uniform 1/4-inch strips.
You’re aiming for fries that are about the size of your pinky finger – not too thick, not too thin!
Keep your cuts as even as possible to ensure all your fries cook at the same rate. If you notice any strips that are extra long, feel free to cut them in half crosswise for easier handling and dipping.
Step 3. Season and Oil Fries

The next vital steps transform plain sweet potato strips into seasoned fries ready for baking!
Place your cut sweet potato strips in a large mixing bowl. Drizzle 2 tablespoons of olive oil over them, making sure you’ll have enough to coat every piece.
Sprinkle 1/2 teaspoon of sea salt evenly across the potatoes. Now comes the fun part – use your hands to toss and turn the strips until they’re thoroughly coated with oil and seasonings. You’ll want every strip to have a nice, glistening layer of oil!
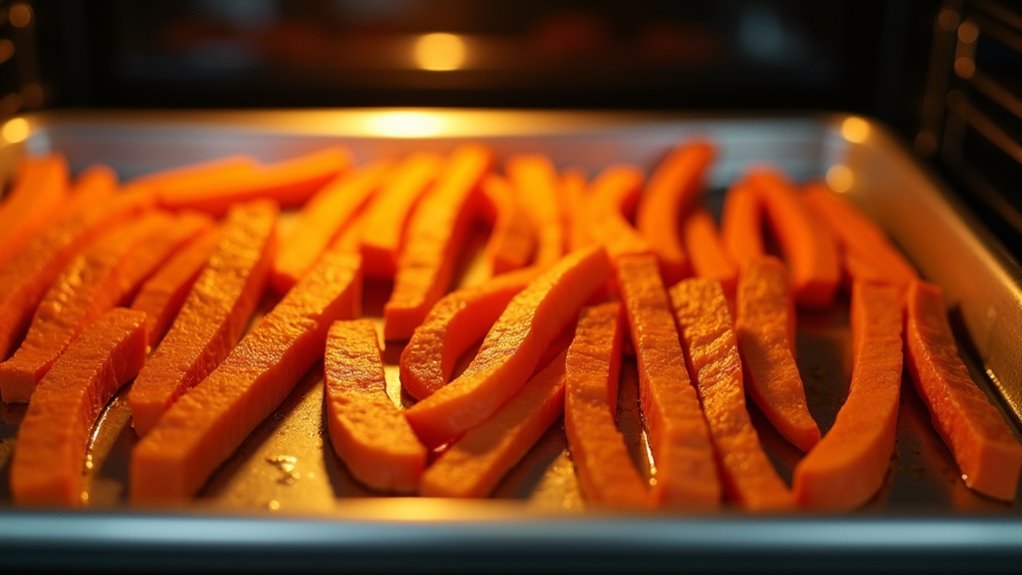
Transfer the seasoned strips to your baking sheet, being careful to arrange them in a single layer.
Don’t let the pieces touch or overlap – this is crucial for achieving that perfectly crispy exterior you’re looking for!
Step 4. Baking First 20 Minutes
Now it’s time for the main event – baking your seasoned sweet potato fries to golden perfection!
Place your baking sheet on the middle rack of your preheated 425°F oven, where the heat will circulate evenly around your carefully arranged fries.
During these crucial first 20 minutes, your fries will undergo an amazing transformation.
You’ll notice their edges starting to turn golden brown as the natural sugars in the sweet potatoes begin to caramelize.
Keep an eye on them through the oven door, but resist the urge to open it – maintaining a consistent temperature is key to achieving that coveted crispy exterior!
The fries need this uninterrupted time to develop their initial crust while slowly cooking through to their centers.
Step 5. Flipping and Final Bake
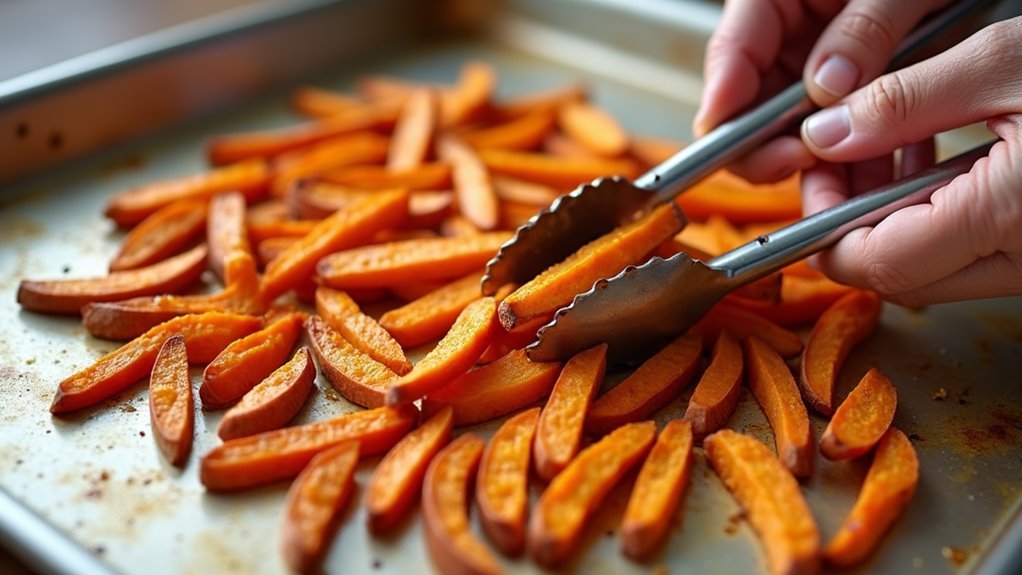
After your initial 20-minute bake, carefully remove your sizzling fries from the oven – it’s time for the critical flip!
Using a sturdy spatula, gently turn each sweet potato strip over to ensure even browning on both sides. Don’t worry if some fries have started to brown more quickly than others – that’s perfectly normal.
Return the baking sheet to the hot oven for the final 10-15 minutes of cooking. You’ll know they’re done when the edges are golden brown and slightly darker than the centers.
Watch them closely during these last few minutes, as sweet potatoes can quickly go from perfectly crispy to overdone!
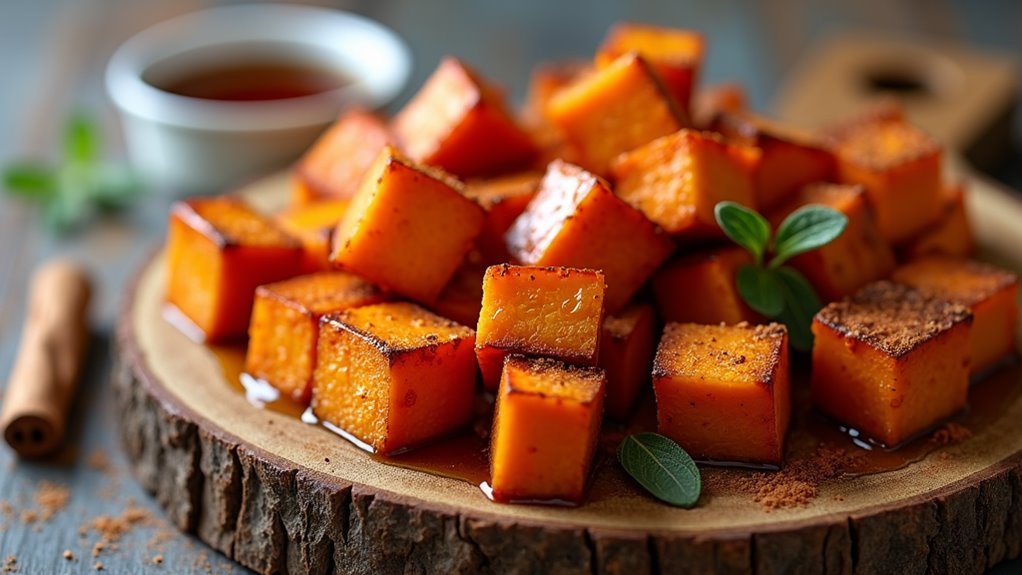
Once they’ve reached that beautiful caramelized state, pull them out and let them rest for 2-3 minutes before serving with your garlic aioli.
Final Thoughts
Making crispy sweet potato fries might take a bit of practice, but you’ll find the results are absolutely worth the effort!
These golden-brown beauties paired with creamy garlic aioli will quickly become your new favorite side dish or snack.
Remember to give your fries plenty of space on the baking sheet – it’s better to use two pans than to crowd them onto one.
You’ll know they’re done when the edges are slightly darkened and crispy, while the centers remain tender and sweet.
Don’t worry if your first batch isn’t perfect – each time you make them, you’ll discover little tricks that work best in your kitchen.
The most important thing is to serve them while they’re still warm and crispy, with plenty of that addictive garlic aioli for dipping!