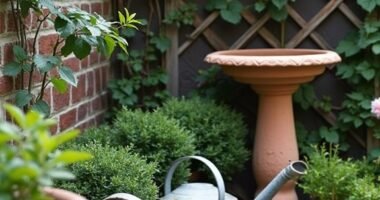

You’ll love these creative DIY trellis projects that transform everyday items into beautiful garden supports. From simple wooden lattices and natural bamboo A-frames to upcycled window frames and repurposed bicycle wheels, there’s a design for every style and skill level. Try copper pipes for modern appeal, or weave rope between cedar posts for an artistic touch. Whether you’re growing roses or morning glories, these inspiring designs will help your garden reach new heights.
Key Takeaways
- Simple wooden lattice trellises can be built using weather-resistant lumber and basic tools, creating an easy DIY garden support structure.
- Upcycled wooden ladders and window frames make unique trellises while adding rustic charm and character to garden spaces.
- Natural bamboo poles can form sturdy A-frame trellises when secured with twine and cross-pieces every 12 inches.
- Metal cattle panels can be bent into elegant garden arches and secured with T-posts for a durable climbing plant structure.
- PVC pipe frames offer lightweight, customizable trellis options that can be painted and configured into various vertical garden designs.
Simple Wooden Lattice Trellis
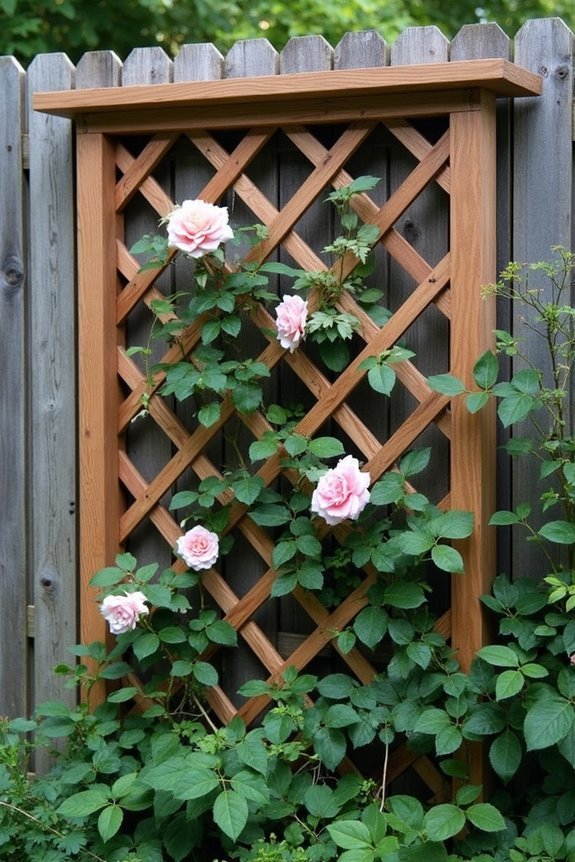
Whether you’re dreaming of a charming garden feature or need support for your climbing plants, a simple wooden lattice trellis is the perfect weekend project for any DIY enthusiast. You’ll need weather-resistant lumber, galvanized nails, and basic tools to create this beautiful garden addition. Consider using specialized vine mounting clips to securely attach climbing plants to your trellis structure. Creating a custom lattice panel allows you to match your garden’s unique dimensions perfectly.
Start by constructing your frame using 2x4s cut to your desired height and width, making sure to seal any cut ends to prevent rot. Next, create your lattice pattern by laying thin wooden strips in a diagonal or square pattern, spacing them evenly across the frame. You’ll want to secure each intersection with small nails or wood glue for stability. Once you’ve completed the lattice work, add a protective finish that matches your garden’s style, and you’re ready to install your trellis. For a more sophisticated look, consider incorporating metal obelisks into your garden design alongside your wooden trellis.
Repurposed Bicycle Wheel Trellis
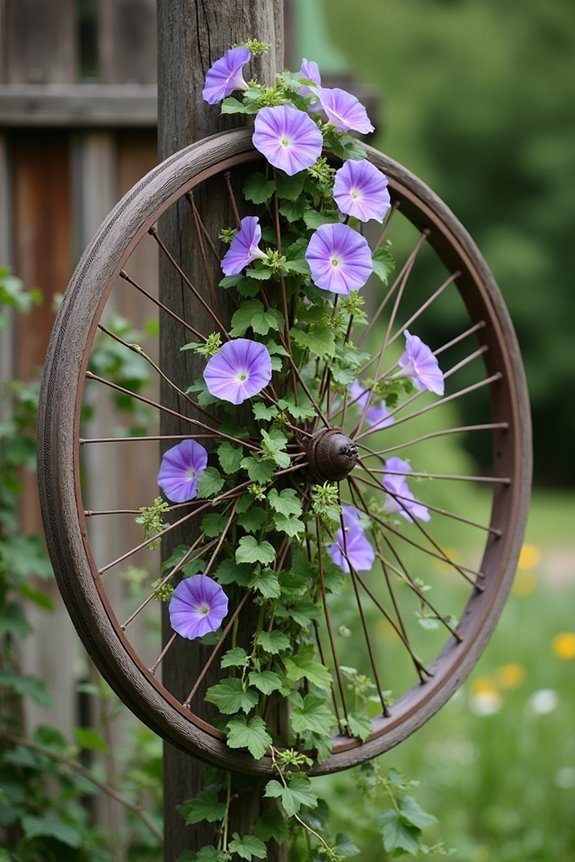
A single old bicycle wheel can transform into a stunning garden trellis that’s both eco-friendly and eye-catching. You’ll need to clean the wheel thoroughly, remove the tire if it’s still attached, and spray paint it in your favorite color to prevent rust and add personality to your garden. For a more artistic touch, consider adding garden statues around the base to create a cohesive decorative theme. Adding metal sculptures near your trellis can create an artistic industrial-meets-nature aesthetic that enhances your outdoor space.
Mount your wheel horizontally on a sturdy post or vertically against a wall, making sure it’s secured firmly. You can add strength by attaching thin garden wire between the spokes to create an even more intricate climbing surface. Plant your favorite vining flowers or vegetables around the base – morning glories, clematis, and pole beans work beautifully. As your plants grow, gently guide them through the wheel’s spokes and watch as they create a living piece of garden art. For additional support, consider adding climbing support nets between the wheel’s spokes to give your plants extra guidance as they grow upward.
Copper Pipe Modern Trellis
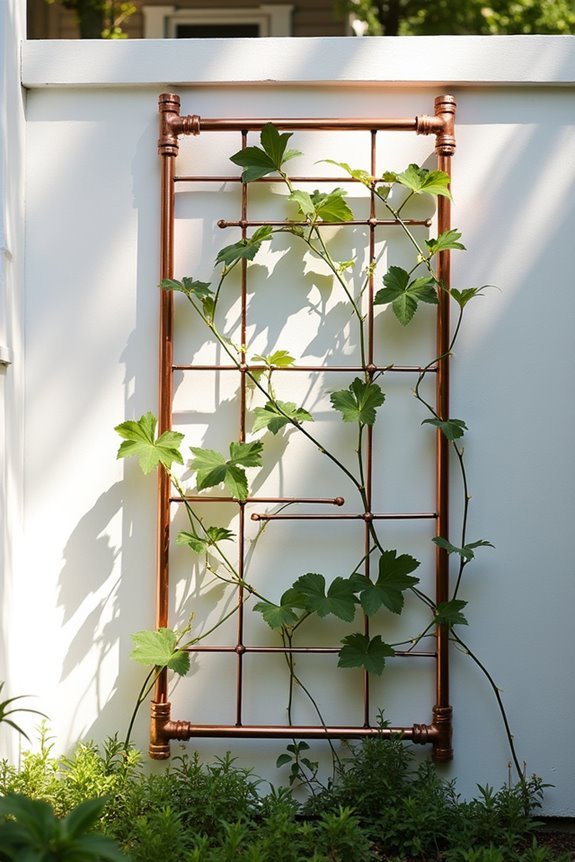
Modern elegance meets DIY functionality in a copper pipe trellis that’ll bring sophisticated charm to your garden space. You’ll love how the warm metallic glow of copper pipes creates stunning geometric patterns while supporting your climbing plants. With just a few basic tools and materials from your local hardware store, you can craft this eye-catching garden feature. Garden stake accessories can add extra visual interest to your trellis design. Like weather-resistant outdoor decor, this project stands up beautifully to the elements.
| Materials | Tools | Time |
|---|---|---|
| Copper pipes | Pipe cutter | 2-3 hours |
| Copper fittings | Measuring tape | Step 1 |
| Copper cleaner | Level | Step 2 |
| Outdoor sealant | Sandpaper | Step 3 |
Before you begin assembly, lay out your design on a flat surface and verify all measurements are precise. As the copper ages, it’ll develop a beautiful patina that adds character to your garden. You can protect the shine with sealant or let nature take its course for a more organic look. Consider incorporating expandable willow trellises alongside your copper creation for a striking contrast of natural and metallic elements.
Natural Bamboo A-Frame Design
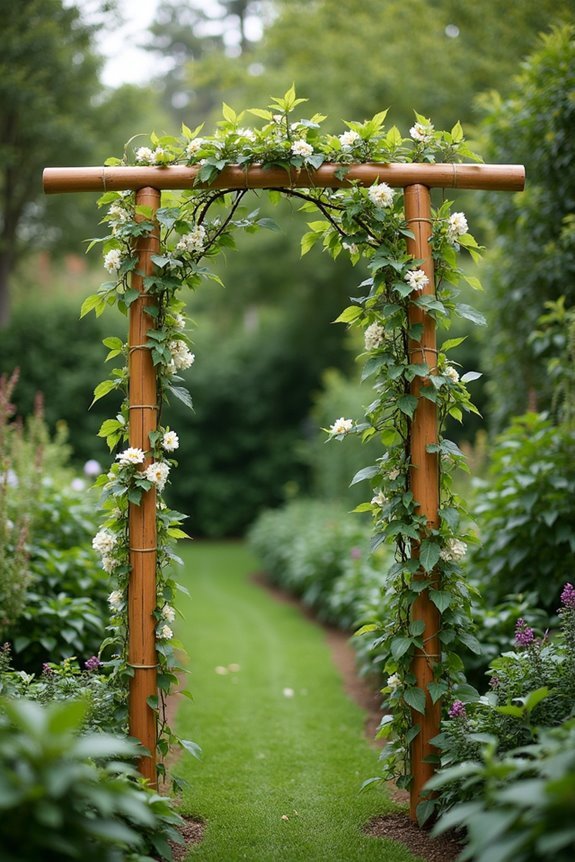
Because bamboo brings natural elegance to any outdoor space, you’ll find this A-frame trellis design both beautiful and sustainable. Start by selecting six sturdy bamboo poles of equal length, roughly 6-8 feet tall, for the main structure. You’ll need three poles for each side of your A-frame.
Begin by creating two triangular shapes, binding three poles together at the top with natural twine or garden wire. Once you’ve secured both triangles, connect them with horizontal bamboo crosspieces every 12 inches. These crosspieces will provide the perfect support for your climbing plants. To guarantee stability, dig 6-inch holes for the base poles and pack the soil firmly. Add smaller diagonal pieces between the crossbars to create a lattice effect that’ll help guide your vines as they grow. Consider positioning your trellis near a water feature installation to create a peaceful garden atmosphere that attracts birds and butterflies.
Vintage Window Frame Garden Support
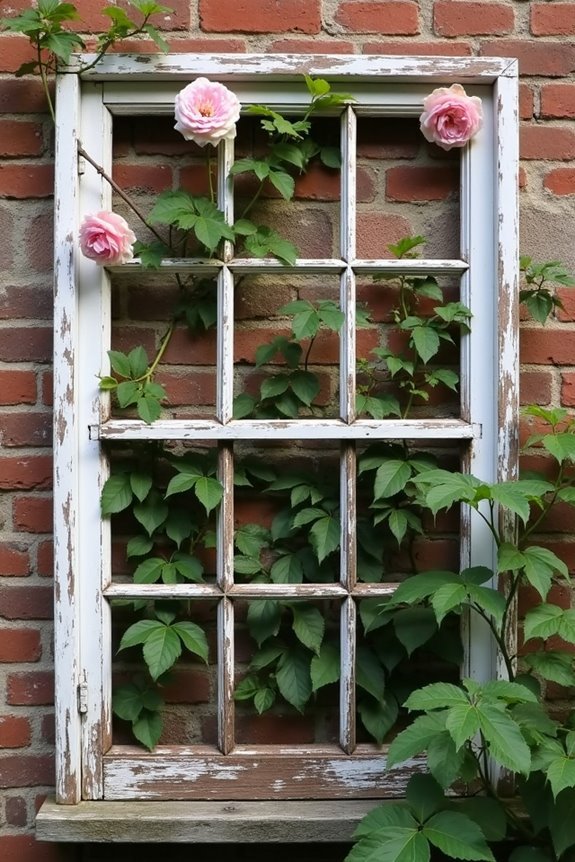
While upcycling brings creative joy to gardening, transforming vintage window frames into charming garden trellises offers a uniquely beautiful way to support your climbing plants. You’ll find that old wooden window frames, with their natural weathering and character, create an instant focal point in your garden space.
To create your window frame trellis, start by removing any remaining glass and sanding rough edges for safety. You can anchor your frame securely by attaching metal poles or wooden stakes to its base, then positioning it where you’d like your vines to grow. Consider painting the frame in your favorite garden-friendly color, or let its natural patina shine through. Sweet peas, morning glories, and climbing roses will weave their way through the frame’s squares, creating a living piece of art.
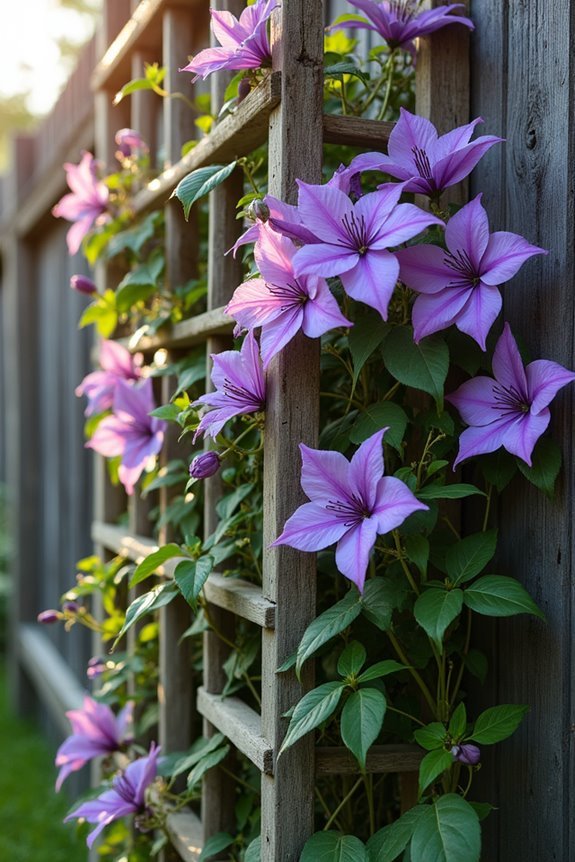
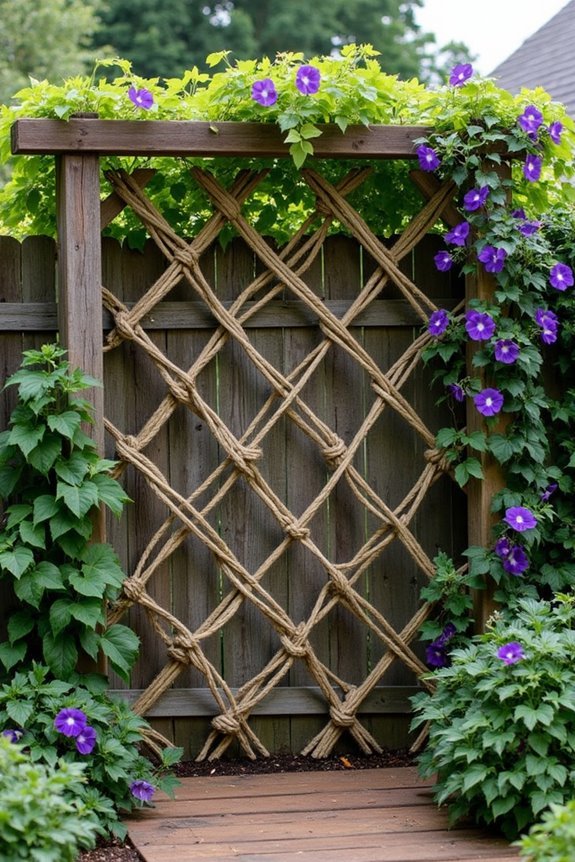
Geometric Wire Pattern Trellis
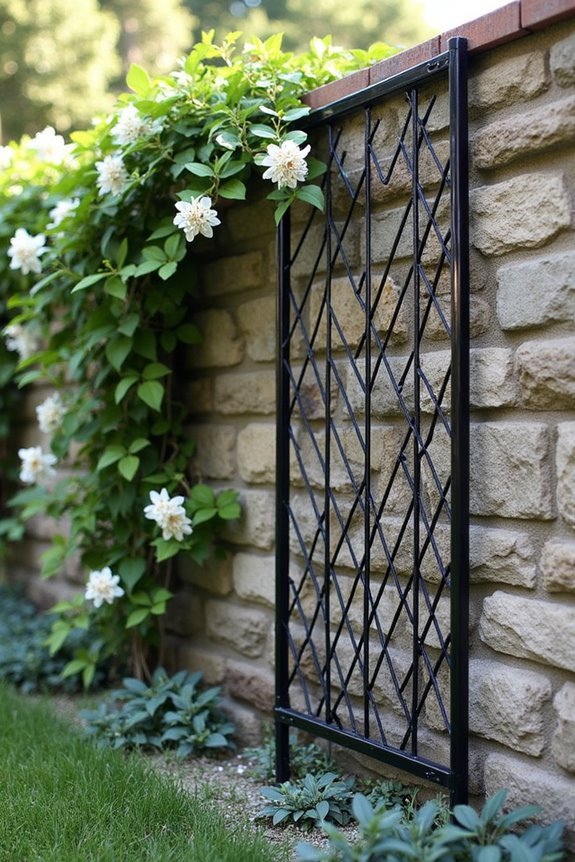
Taking inspiration from nature’s geometric patterns, a wire trellis design can bring striking visual appeal to your garden space. You’ll find that creating diamond, hexagonal, or honeycomb patterns with sturdy wire adds both function and contemporary style to your climbing plants.
To craft your geometric trellis, you’ll need heavy-gauge wire, wire cutters, and a wooden frame to serve as your base. Start by mapping out your chosen pattern on paper, then carefully bend and shape your wire to match your design. You can create multiple layers of geometric shapes, securing each intersection with smaller pieces of wire. Once you’ve completed your pattern, attach the wire framework to your wooden base using strong staples or small screws. Your climbing vines will love weaving through these artistic shapes.
Rustic Branch and Twine Structure
Nature’s simplicity shines through in a rustic branch and twine trellis, offering a charming, eco-friendly support for your climbing plants. You’ll love how this natural structure blends seamlessly into your garden while providing sturdy support for your vines and flowers.
Start by collecting strong branches from your yard or local wooded area, making sure they’re at least an inch thick. You’ll need several vertical pieces about 6 feet tall and shorter horizontal pieces for cross-supports. Clean the branches, remove any loose bark, and let them dry completely. Position your vertical branches in the ground about 2 feet deep, spacing them 2 feet apart. Secure your horizontal branches using natural twine, creating a lattice pattern that’s both functional and beautiful. Add extra support by weaving thinner branches diagonally across your structure.
Metal Cattle Panel Arch Trellis
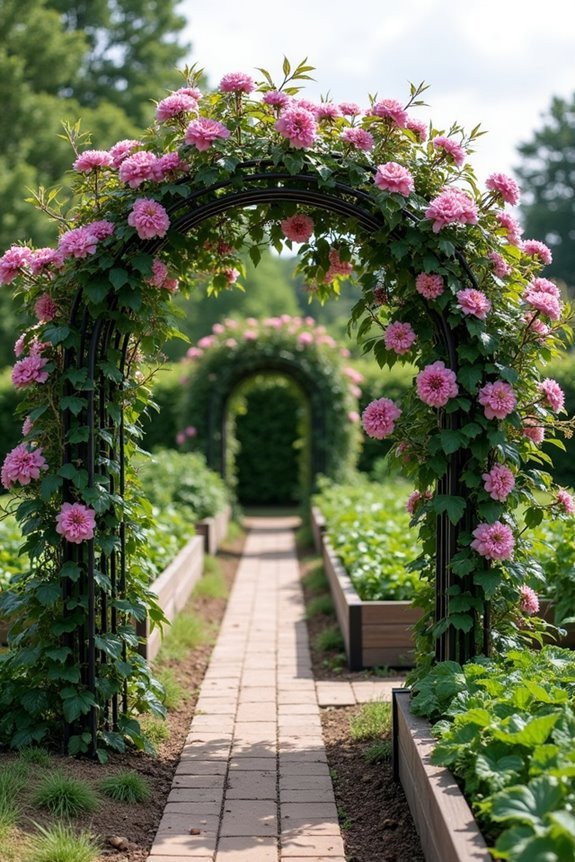
A sturdy metal cattle panel can transform into a beautiful garden arch that’s both practical and eye-catching. You’ll find these panels at most farm supply stores, and they’re perfect for creating a lasting structure that will support your climbing plants for years to come.
To create your arch, you’ll need to secure two T-posts on each side of your garden path, spaced about 4 feet apart. Bend the cattle panel into a gentle curve, and attach it firmly to the posts using strong wire or U-bolts. The width of your arch will depend on your path, but most panels create a perfect tunnel about 3 to 4 feet wide.
Once it’s secure, you can plant your favorite climbers like grape vines, clematis, or morning glories at the base. They’ll quickly turn your metal arch into a living garden gateway.
Upcycled Ladder Plant Support
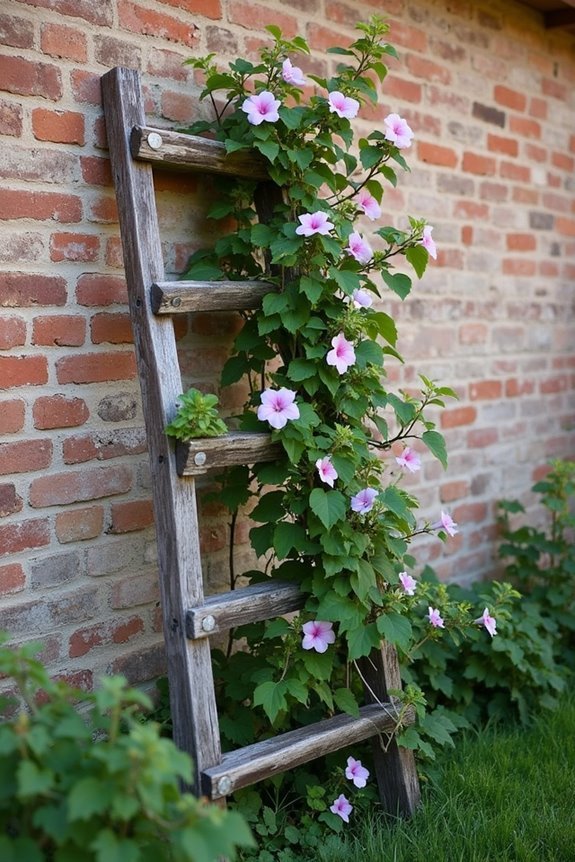
Old wooden ladders make brilliant DIY trellis solutions for your garden, bringing both rustic charm and practical plant support to your outdoor space. You’ll love how easy it is to transform an unused ladder into a beautiful vertical growing structure that adds character to your garden beds.
To create your ladder trellis, you’ll need:
- A sturdy wooden ladder, cleaned and sanded
- Weather-resistant wood sealer or paint
- Strong garden twine or wire for securing plants
- Ground anchors or stakes for stability
Position your ladder at a slight angle against a wall, or create an A-frame structure using two ladders hinged together. The rungs provide perfect support for climbing vegetables like peas and beans, while the vertical sides work wonderfully for training flowering vines. You’ll be amazed at how this simple repurposed item becomes a stunning garden focal point.
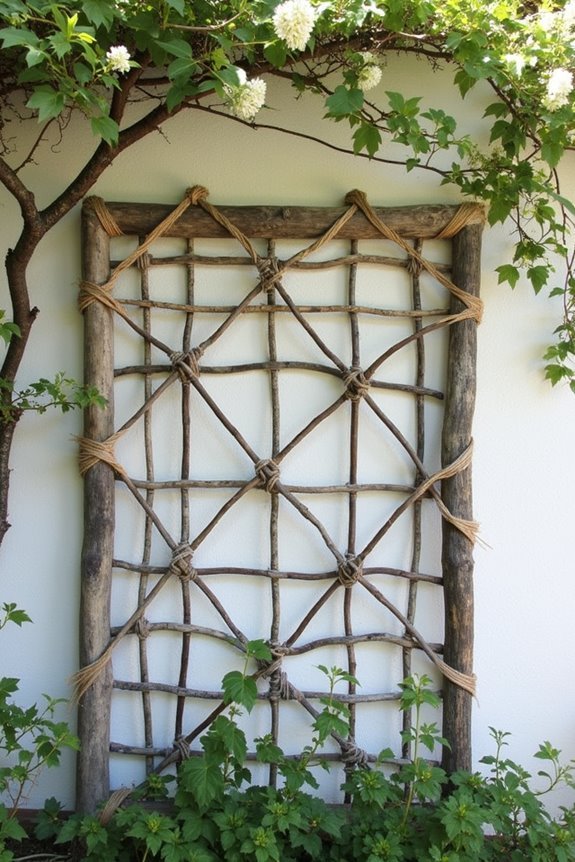
Woven Rope and Wood Design
Whether you’re a creative DIYer or just starting your garden journey, you’ll love crafting this beautiful woven rope and wood trellis that combines natural textures with practical design. This project transforms basic materials into a stunning garden feature that’ll support your climbing plants while adding visual interest to your outdoor space.
| Material | Purpose |
|---|---|
| Natural rope | Creates flexible grid pattern |
| Cedar posts | Provides sturdy framework |
| Galvanized hardware | Guarantees weather resistance |
You’ll start by setting your wooden posts, making sure they’re level and secure. Next, weave your rope in a crisscross pattern, creating squares that are perfect for guiding plant growth. As you work, keep the tension consistent to maintain the trellis’s shape and stability. The finished piece will serve as both a functional growing support and an artistic garden focal point.
PVC Pipe Vertical Garden Frame
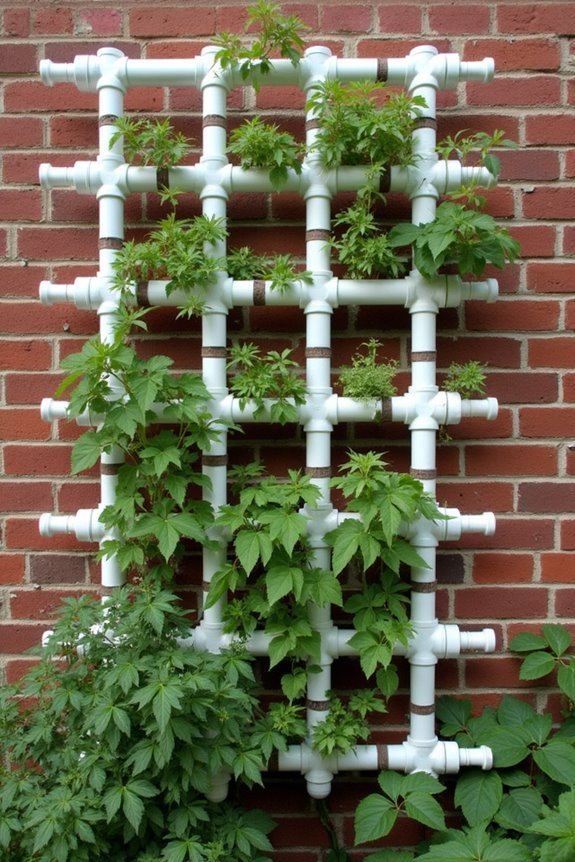
Modern gardeners looking for a budget-friendly trellis option will love the versatility of PVC pipe designs. You’ll find that PVC pipes are lightweight, weather-resistant, and perfect for creating a sturdy vertical garden frame that’ll last for seasons to come. The best part is, you can customize the size and shape to fit your specific garden needs.
- Use 1-inch diameter pipes for smaller plants like peas and beans
- Create multiple tiers by connecting pipes with T-joints and elbows
- Add mesh netting between frames for extra climbing support
- Paint your PVC frame with exterior paint to match your garden’s style
With basic tools and a few hours of work, you’ll have a professional-looking trellis that’s both functional and attractive. The simple assembly process means you can easily modify or expand your design as your garden grows.
Reclaimed Door Garden Trellis

Breathing new life into a vintage door can create one of the most charming and eye-catching trellises you’ll ever see in a garden. You’ll want to start by cleaning your old door thoroughly and removing any loose paint or hardware that might be unsafe. Once it’s clean, give it a fresh coat of exterior paint in your favorite color, making sure to seal it well against the elements.
To install your door trellis, you’ll need to secure it firmly in the ground using metal posts or wooden beams. Add mounting brackets to keep it stable, and don’t forget to create proper drainage around the base. Plant climbing roses, jasmine, or clematis near the bottom, and you’ll soon have a stunning vertical garden feature that tells a beautiful story of repurposing and renewal.
Frequently Asked Questions
Can Climbing Plants Damage the Walls of My House Behind the Trellis?
Yes, climbing plants can damage your walls if they attach directly to them. You’ll want to keep your trellis at least 6-12 inches away from the house to prevent moisture buildup and structural issues. If you’re using self-clinging plants like ivy or virginia creeper, they’ll need extra monitoring since their tendrils can work into mortar joints and create cracks. Don’t worry though – a well-placed trellis will protect your walls beautifully.
How Far Should I Space Multiple Trellises in My Garden?
Like dancers sharing a stage, your trellises need room to shine! For most climbing plants, you’ll want to space your trellises 4-6 feet apart. This gives each plant enough breathing room to spread its leaves and thrive. However, if you’re growing particularly vigorous climbers like wisteria or grape vines, you might need 8-10 feet between each trellis to prevent your garden from becoming overcrowded.
What Is the Ideal Height for a Trellis to Support Mature Plants?
You’ll want your trellis to be 5-8 feet tall for most climbing plants, though the ideal height depends on what you’re growing. Vegetables like peas and cucumbers do well with 6-foot trellises, while flowering vines like clematis or climbing roses might need 8 feet or more. Don’t worry if you’re unsure – you can always start with a 6-foot trellis, which works perfectly for most garden favorites.
Should I Treat or Seal My Trellis Materials Before Installing Outdoors?
You’ll definitely want to treat your trellis materials before setting them up outdoors. If you’re using wood, apply a weather-resistant sealer or exterior wood stain to protect against moisture, rot, and UV damage. For metal trellises, use a rust-inhibiting primer and paint designed for outdoor use. Don’t skip this step – it’ll extend your trellis’s life by several years and keep it looking beautiful throughout the seasons.
How Do I Safely Anchor a Trellis in Areas With Strong Winds?
You’ll want to secure your trellis deeply and firmly to withstand those strong winds. Start by digging holes at least 2 feet deep, and fill them with concrete around your posts. For extra stability, install diagonal support braces at 45-degree angles, and don’t forget to add sturdy anchoring hardware at multiple points. In very windy areas, you can also create a windbreak with nearby plantings or fencing.